
I've got a newborn session coming up this weekend, and decided to finally act on the idea for a DIY backdrop stand that has been floating around in my mind. A few searches online revealed ideas similar to mine, so I decided I wasn't completely crazy and set off for the home improvement store to gather the supplies.
I knew the bill wouldn't be very big, but I was really pleased to see it come in at just under $20! Can't beat that for a sturdy, portable stand.
If you'd like to make one of your own, give these instructions a try. Please, please feel free to post your questions and I'll do my best to answer them for you. The process may look complicated, but I promise you it isn't. You'll smile at how simple it was once you're admiring your handy work.
Supplies You'll Need:
(3) 10-foot lengths of 1-inch, schedule 40 PVC pipe
(2) 90-degree, slip-in elbows {that means without threads}
(8) T-Shape slip-in connectors
(8) Slip-in end caps
A Hack saw or pipe-cutting tool {available in the plumbing section}
How to Build:
Now, this is where things get a bit more complicated! If you're like me, transporting several 10-foot lengths of pipe won't be a possibility. I've got a somewhat small SUV, and wasn't up to the challenge of tying things down with a toddler in tow. If this sounds like you, find a helpful employee at the store and kindly ask them if they'll help you make a couple of cuts so you can more easily transport your PVC.
Ask for the following cuts:
(4) Five-foot lengths {will use up two of your three 10-foot lengths of PVC}
(2) Three-foot lengths
(1) Four-foot length
This will allow you to maneuver the PVC through the store and into your car, and it'll save you a few cuts at home too!
Next, you'll need to make several more cuts at home. Work carefully and measure well to create an even, easy-to-work with backdrop stand.
The following is a complete list of cuts, with notes made if they have already been made for you by your helpful store employee:
(2) Five-foot lengths {already done!}
(2) Three-foot lengths and (2) two-foot lengths {cut these from the remaining five-foot sections}
(4) 18-inch lengths {cut from the two three-foot sections}
(8) 6-inch lengths {cut from the four-foot section}
Assembly looks like this:

...and this:

Once you've cut everything to the appropriate length, you can simply fit it together like a puzzle. I originally planned to glue some of my elbows and things in place, but after putting it together, I opted to skip the glue. This is because I have a nice, tight fit without the glue, and because I like the option to completely disassemble the pieces and create something different if I wish.
Some note-worthy thoughts and suggestions:
-Look for fittings that are not threaded. You shouldn't see threads on ANY of your connecting pieces, and if you do, you'll need to find the slip-in pieces before you can assemble your project.
-Make sure your PVC pipe is the same size as your fittings! Standing in front of that big wall of fittings and connectors, it's easy to grab from the wrong box. Double check each piece before you pay.
-Buy some heavy-duty clamps while you're at the hardware store, as pictured below. They're very sturdy, and will hold your blankets, material, etc. in place.

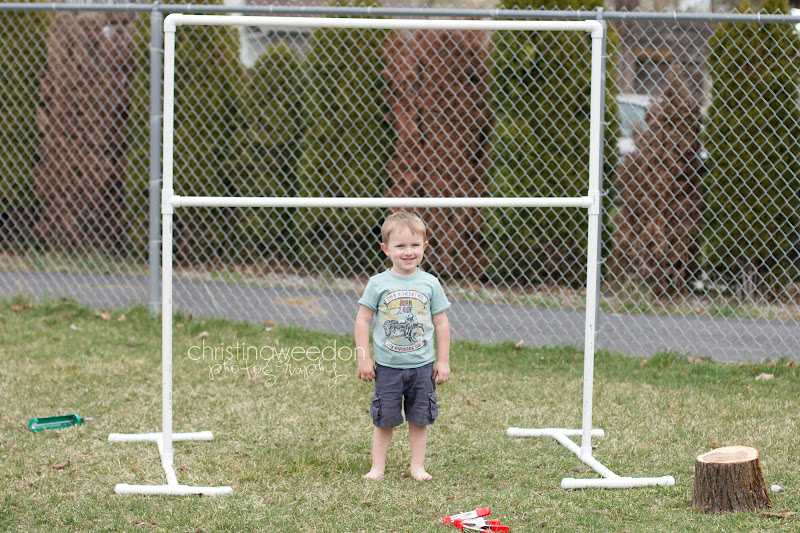
The last step? Ask your super-cute model to stand in front of your backdrop stand and take it for a test-drive. My model was a bit distracted, but daddy will be pleased to see his prop choice:

If you follow my tutorial, I'd love to hear about your experience!!
I just bought the materials and I am off to assemble mine. You rock! Thank you so much!
ReplyDeleteAwesome!! Hope you enjoy it! I'd love to read an update when you're all done :)
ReplyDeleteI just finished it in under an hour. It is great! http://www.facebook.com/#!/photo.php?fbid=10150974849754012&set=a.10150863569634012.512306.775584011&type=1&theater. Great tutorial! I even followed your advice and had the guy cut it for me to have it fit into my Prius.
ReplyDeleteThank you again!
Sandy
Aw, rats! I can't see the image. If you're a follower of my Facebook page, I welcome you to share it on the wall! :) ...I'm glad you had fun with this--and isn't it surprising how quickly it comes together?!
ReplyDeleteWhat a super-cute model! :)
ReplyDeleteToday it's may 2015 and I just used this to build a backdrop. It's extendable even. Phew. Thanks a million
DeleteThanks Chanel! I think so too :) ...I'm actually really excited to post an "action shot"--my new backdrop stand in use with a precious newborn. Just as soon as her mama gets to see her gallery!
ReplyDeleteSo excited to try this! My mom has extra pvc pipe in the basement so all i have to do is cut some for the bottom part of it and buy some ends! I have my first newborn shoot so this is absolutely perfect! THANKS!!!
ReplyDeleteSo what kind of fabric do I buy that is wide and long enough to cover the area of the backdrop?
ReplyDeleteA great, inexpensive option is a canvas drop cloth from the hardware store! You could probably even dye them, and I know you could paint on them. Home decor fabric would likely be wide enough, and then there are blankets and bed sheets! A full-size flat sheet would be MORE than enough, and comes in an endless array of colors.
ReplyDeleteI'm looking to buy fabric at a fabric store and would like to know how many yards I should order. I will be using Home Decor fabric which says it is 55" wide... any help would be helpful! I'm also going to go to Joann to ask what their opinion might be.
DeleteAs of April 25 2016, Costco has some really nifty floral design beach towels ($13.79) which are 40x70 (101cmx177cm). A pair would make a great backdrop and you could use them as towels when you are tired of them as a backdrop!
DeleteThis is great, thank you so much for sharing!! I am a beginner photographer and have my first newborn session coming up. I don't want to spend the hundreds of dollars right now on a professional stand, so I am putting my husband to work this week on this. :-) I would think it would be fairly easy to add to this to make it bigger if needed, right?
ReplyDeleteAnd what a great idea about the canvas drop! :-)
Thanks Christina!!! I'm ready for my shoot...PS: if anyone is looking for a cheap dropcloth for newborns, head to Joann's when they have soft fleece on sale and pick up the gray heather. Cheap, easy to wash and works great with this stand. I got 2 yards and it's plenty.
ReplyDeletewhat is that cute font?!?! the one where you said "DIY back drop stand" etc. I'm totally building one this weekend.
ReplyDeletelol! which font, now? the blog post title? or the red writing on the images?
ReplyDeleteThank you for this blog! I am making one this coming week!
ReplyDeleteOMG I'm so excited about this!!! This is the most SIMPLE PVC backdrop stand I've ever seen - Thank you so much for sharing!!!
ReplyDeleteI'm glad so many of you love this tutorial!! If you make one, or if you already have, I'd love to see pictures of it in use :)
ReplyDeleteI just wrapped up my build for a children's beauty pageant to tomorrow and will post some shot samples soon! Thanks for the tutorial!
ReplyDeleteDid you use glue of any sort? I just tried putting mine together and it fell apart. lol I followed the tutorial but it was a NO GO lol
ReplyDeleteWhat on earth?! Oh my! When I assemble my stand, I sometimes have to get HELP to get the pieces apart. If I push them in too far, they're a really snug fit. Is there a chance you could have purchased conflicting PVC and fitting sizes? What variety of PVC did you purchase? Is it thick? or very thin and flexible?
DeleteSand or carve the pipe so the ends are very slightly tapered. The inside of the fittings are tapered. Be careful not to take off too much material. I suspect(but have not tried) that you could cut a thin slot about 1"long on one side of the pipes for the same "easy disassembly" effect
DeleteWhat do you recommend for a good, sturdy backdrop cloth?
ReplyDeleteGood morning! I've used a number of things on this stand. You can of course hang blankets and fabric yardage. Home decor weight fabrics are really nice. You should also think outside of the box. What about a cool shower curtain? or a quilt? Bed sheets are a fun way to add a pop of color too, and very inexpensive.
DeleteWhat about a vinyl table cloth?
DeleteThanks for this great tutorial! Just threw it together in no time for a newborn shoot tomorrow, and I am *super* excited to use it! I'll get a shot of it in-use for you.
ReplyDeleteAwesome!! Good luck with your shoot :)
DeleteLoved tutorial worked out well
ReplyDeleteChristina,
ReplyDeleteThis is totally awesome!! I do photography on the side and I can say i am pretty new to it and don't know EVERYTHING, but it is a learning experience and you learn something new everytime you go out to shoot. A lot of my photography is inside but i do have two sessions where they wanted traditional setting. I thought oh dear what am i going to do until i found this. this is great. Thanks so much for sharing as it really is inexpensive to do which is even better. My only question is, is this set up for Kids and newborns? i have a adult photo shoot. should i go with longer pvc pipe to make it taller. Any help would be awesome. Thanks again.
Kelly
Great question, Kelly! It'll stand about five feet tall after you're done with assembly. If you wish to have adults stand in front of the backdrop, I'd say, yes, make it taller! If you wish to have a family seated in front, you could probably get away with the current lengths. I use my stand for newborns, so I don't have that height issue ;)
DeleteIf I make this taller, should I make the stand part longer to accommodate the height? Thanks! This is an awesome tutorial!
DeleteUnless you're making it quite a bit taller, I don't think you need to worry about increasing the length of the "feet." You could, if you're concerned, or you could also place a sand bag/bag of rice or beans/etc. over the back "feet" to make it even more steady.
DeleteThanks Christina, and i meant that i do a lot of my sessions outside so doing them inside is new to me. I have my husband picking up the stuff for me and i ordered a photography light this morning. That is also a new thing to me on where to place the umbrella light and what not. Like i said it is a learning experience but i am loving every minute of it. thanks so much for your help. this was a great tip to everyone!!!
ReplyDeleteI had a feeling that was what you meant :) ...when you're setting up your room, remember to consider the thickness of your backdrop material and what is behind the stand. I would suggest using a relatively thick cloth, and if I were you, I'd place it up close to a wall. All of that extra light bouncing around the room could have the adverse effect of causing light to show *through* the background material, assuming you're using cloth and not seamless paper. Good luck with your session!
Deleteyes, after research and research i am using a thick cloth. :) Again thank you for all your help. I am hoping the light is here in the next few days so i can "play". I think it's great that you share your tips and tricks. not a lot of photographers do that or are willing to help. I think there afraid of the competition. lol. again, thanks so much. Look forward to your tips in the future.
ReplyDeleteKelly
Perfect! And thank you :) ...let me know how your session goes!
DeleteHow hard is this to take apart and put back together?? My father in law is a plumber so he has all this laying around the shop:-) gonna be making this but I too have a smaller suv and would like to know how easy it is to assemble and disassemble??
ReplyDeleteTaking the stand apart is very simple! It's all about how you assemble the stand. If you push *really* hard when you're setting it up, you're going to have to pull *really* hard to get it apart again! If you don't push hard enough, it won't stay together :) ...play with the pieces some before you get to a location shoot, and you'll quickly understand what you need to do to get a sturdy fit without any acrobatics to get it apart again!
DeleteOnce you find out where you like the pieces (when together) you could mark where the end of the end pieces are with a permanent marker, so you don't have to remember it, or have to play with it every time! :)
DeleteGreat tutorial!!! Is it pretty sturdy? I've seen some YouTube vids and they would sway back in forth however none of them had the pipe in the middle. Thanks!!!
ReplyDeleteIn my opinion, yes! It's very sturdy! I've definitely not experienced any swaying or wobbling. Of course, PVC is flexible. Use your best judgement with, say, a wild and crazy two-year-old :) ...but as a general rule, you should have no trouble at all.
DeleteI've used my stand on carpet and wood floors, with various parts of the leg cross-braces removed to get a wider shot, etc., all with NO trouble.
{Oh! and reading your other comment--I didn't post them both since they were near duplicates. That comment moderation thing is tricky!--I do not need to weigh my stand down with anything. It stands on its own very nicely. I'm quite cautious around newborns, especially, and have NEVER felt like any extra caution is needed with my stand.}
DeleteThanks for sharing! I'm not a photographer but I do enjoy taking my own holiday or special event photos and this is something I would LOVE to have. And seeing how you only spent $20 is even more exciting! So much better than taping sheets to my wall! Hahaha
ReplyDeleteMy turn to say "Thank you!!" I just found this last night, took a pain free trip to Lowe's with my little man in tow, and was able to assemble it in no time! Your instructions were clear and easily understood. Thank you SO MUCH!
ReplyDeleteThank you! Sleep-deprived from long days of being on the video curve (background looked fine until file was exported and compressed, going with green screen). So happy to find your simple instructions.
ReplyDeleteAwesome! So glad I found this! I have been looking for a good tutorial for this..I am off to the parts store! Thanks so much :)
ReplyDeleteThank you! Iam doing the sets for a charity panto this is great for moveable sets ,graet instructions were clear THANK YOU FROM US ALL ON STAGE CREW. ( MERRY CHRISTMAS)
ReplyDeleteJust made this!! Came out to $21 here in VA, took less than an hour to cut and assemble! Thank you for such a great tutorial!
ReplyDeleteThis is awesome! I'm a photography student at a university and I don't have the money to buy a lot of professional equipment, but I wanted to start taking photos for my portfolio. I'm doing a maternity and newborn shoot for a friend this spring, and I'm absolutely loving the idea that I can make my own backdrop stand for so little money, and really so little effort as well. Thanks so much for sharing this idea!
ReplyDeleteThanks so very much for this, it took me less than an hour to cut from scratch & build and only cost me $75... Just brilliant! Am sewing backdrops right now to get started tomorrow :)
ReplyDeleteWonderful tutorial!!! Thank you!!! Bought and assembled mine tonight! So excited to offer newborn shoots out of my home soon thanks to this!
ReplyDeleteI built this the other day. I made it a bit wider because of the faux flooring I made with it but everything here only cost me $60. Love it!
ReplyDeletehttp://www.flickr.com/photos/joshua_himes/8392831775/
http://www.flickr.com/photos/joshua_himes/8392831797/
Wondering how you made this wider? What measurements did you use and what did you use to hold it in he middle to make it more sturdy.
DeleteMade this today, tutorial was very easy to follow. Thanks for the clear directions on cuts!
ReplyDeleteJust starting out and ran across this, made it today and love it!!!! Thanks for sharing this!!!
ReplyDeleteProbably a dumb question but instead of cutting the pieces when you get home ... why not having home depot cut all of the dimensions you need and then all that you have to do is put it all together?
ReplyDeleteThere are no dumb questions! In the tutorial, I mention asking for a few basic cuts--mostly so that I could get the pieces through the store and into my car more easily. There is a limit to what the staff at your average store can and will do, though, and they're usually pretty busy in our neck of the woods. I didn't mind making a few cuts at home :)
DeleteHi there, lovely tutorial, best one out there.
ReplyDeleteQuestion, how would you say the stand is sturdy-wise? I was thinking of building one good for outdoor use too. Maybe as precautionary adding an extra 'arm' to make it an outward T, thoughts?
Thanks! :) A friend borrowed my stand for an outdoor birthday photo booth. She had no trouble, to my knowledge. The only "modification" she made was to weigh it down with a couple of sand bags placed over the "feet" that stick out from the back/front.
DeleteI haven't used the stand outdoors yet, but I have used the top cross-bar to hold a brand new {heavy!!} roll of seamless photo paper. It didn't wobble a bit.
Hope this helps you :)
Just made this for my wife, thank you for the plans, fast, easy, and cheap.
ReplyDeleteThis is great!! I have been panicking on spending the money on a professional photo stand. This just saved me!
ReplyDeleteJust followed these directions & it's perfect. Thanks! And I found some curtain panels and tablecloths on clearance @ Target that are just right for the actual backdrops. Thrilled!
ReplyDeletetable cloths, curtain panels. good idea. thanks.
DeleteThank you so much for this tutorial! I made this today and it was super easy! My only question is how do you "store" this personally? I'm a little OCD with stuff having a "place" and I was just wondering how you stored this when it was taken apart?
ReplyDeleteHi Crystal! We've got lots of basement storage, so pretty storage wasn't a big deal for me. I use a clean five-gallon bucket to stand all of the pieces in, with the bucket in a corner and the longer lengths propped in the corner. Does that make sense?
DeleteMakes total sense! Thanks so much for the tip. :)
DeleteI threw mine into a hockey bag that my kids had outgrown, the bag has wheels so I can take it to a clients house. Perfect tutorial, but it was a little more expensive in my Canadian Home Depot.
DeleteTotal cost was 85.00 but I had them do all my cuts so I didn't need to buy the cutters.
DO you think you could do this same thing but make it twice as big and it would still hold up? Has anyone tried making a bigger one for teens/adults
ReplyDeleteWhat about adding some extra cross-supports for stability? Perhaps vertically, down the center? or...?
DeleteI did just that. Made mine eight feet wide and seven feet tall with a beam across the center both vertically and horizontally and a foot in the center just going behind (instead of both in front and behind like the side feet) for stability. I didn't want the foot to stick out in the center where I would have people standing. It works great for full families.
DeleteThanks for this post... I was just asking about making a larger rig more stable.
Deletethis is great and has saved me lots of money and time!!! u rock
ReplyDeleteThis is fabulous! You are saving this newbie a lot of money. Thanks so much for posting it!
ReplyDeleteMichel
www.amusingmamma.blogspot.com
Thank you SOOOOO MUCH FOR THIS I totally couldnt afford a 200 Backdrop holder :D
ReplyDeleteLove this thank you
ReplyDeleteThank you
ReplyDeleteThis is great!! I have a photo shoot at a pageant in a couple months and this will be awesome to bring!!
ReplyDeleteThank you so much! I just finished making this, and it looks great! SO easy to make...the hardest part was searching for the connecting pieces at my apparently unorganized hardware store. I'm so excited to use it.
ReplyDeleteThanks!
ReplyDeleteIn your experience, how large would you feel comfortable making this rig, before you felt it started getting too unsable? (I was thinking about following your directions, but trying it 2x wider and 2x taller.)
-Tim
Just finished mine! Was going to but one yesterday for $169, so happy you shared with us!! Love it!! Going to make an 18 inch addition for the top to accommodate taller adults
ReplyDeleteJust made this last night! Only took me 30 minutes and cost $23! Thank you so much for the instructions. I cut two 4' pieces to add a bit more versatility. Awesome!
ReplyDeleteI is possible to make is 8 feet tall and 12 feet wide.
ReplyDeleteCertainly! It has been discussed some in the comments already, but I would suggest using connectors in the center for more manageable size lengths of PVC, and possibly even a third stand/leg in the center not support larger backdrop pieces or rolls of seamless paper. Also, consider some sand bags or other weights to keep the whole thing from tipping, as it will be considerably more top-heavy.
DeleteThis was a great tutorial - very easy to follow! My biggest issue was that here in Canada I couldn't find T-joints and 90-degree joints for 1" PVC. I had to go with the 3/4" PVC, so it doesn't feel quite as sturdy as I think it would with 1".
ReplyDeleteThank you so much for sharing! I was able to go to Home Depot and purchase everything for less than $20, cut it up with a hacksaw, and put it all together in a little over an hour, right before my very first newborn session! I've used it a few more times since and it is perfect. WSU... you must live somewhat close to me, I'm about 30 minutes from Pullman :)
ReplyDeleteHundreds of comments, all of them positive, and mine isn't any different. I perform photography services to friends and family when I'm not in school or looking after my son and it's been really hard financially to break into the industry. Little life hacks like this are what I live for! Thank you so much! I tweaked mine a little bit so it stands 7'5" at the high bar and 4'3" at the lower bar. I plan on making an instruct able based on this page and giving you credit. I'll post the URL when I'm done. Thanks again!
ReplyDeleteNice.
ReplyDeleteI'm an upcoming photographer, and this tutorial is perfect for my first backdrop. I went in with the list and got everything cut with no problem. Thanks for the tutorial. I'll post pictures when I put it together this weekend.
ReplyDeletethank you! I built this with my hubs last night. Yes less than $40! love it. I made an adjustment and have it adjustable...the top part is 1/2" sliding into a 1'. we drilled holes and used a pin to adjust. thankyou!!!!
ReplyDeletethankyou!
ReplyDeleteI want to make one big enough for a family shoot. Tallest person being 6'2 with a total of 10 adults and a toddler. I figured 6'5 for height and width would be enough...would I just add the extra feet to the dimensions you have?
ReplyDeleteHi Kayla, you can certainly alter the measurements in any way you'd like. As discussed in previous comments, I would be sure to use something {sand bags, etc.} to weight the bottom to prevent the structure from tipping. Also--you might consider adding width for a group of that size.
DeleteHi nice backdrop,
ReplyDeleteI made something similar only using coated metal tubing from an old plastic green house very simple to put together, I did run a bit short of open ended tubes (plenty that slotted into the open ended ones). But it was simple to use a pipe cutter to cut a spare section into a plain pipe to join sections. Yours was the closest to my idea i've found.
Thank you!! So easy but so helpful to have guidance, and as someone else mentioned, we appreciate you sharing your knowledge!!
ReplyDeleteQ: if someone is sitting in a chair in front of this backdrop, the backdrop height would be tall enough as to not show the top of backdrop in a picture, correct? It seems to me it would be fine, but I wanted to ask. Is it easy for one person to set up and take down, or is 2 people required? I need a backdrop that can be used at booths at malls, so I needed to find one that can easily be transported. I'm hoping this is something I can alone and not need another set of hands. Looks like a great idea, and just what I need!
ReplyDeleteThere are a few variables at play here, but generally speaking, yes! I would consider the distance between the chair and the backdrop itself, and of course the height and style of the chair.
DeleteI did this entire project by myself, with my then three-year-old. I cut the pieces {minus the cuts I had done at the store} and assembled them, and I assemble the stand solo when I use it. You don't need any hands but your own :)
Considering my needs and how I will I use this, could this be made a little smaller and the subject and backdrop still fit in a photo without the frame showing? This is not traditional photography, not studio photography. It will always be done at malls and vendor fairs, no permanent setup, always traveling, and always sitting for photo. If it can be scaled down and still work, that would be even easier to carry and build. Your input would be appreciated. :) (I was going to go get the materials, and I thought I should ask this first)
DeleteIf I were you, I think I might buy and cut the pieces as listed in the original directions, and then play around. Using a test subject, take several different shots, and then see how you might be able to scale down the width or height.
DeleteI haven't personally tried to work with a smaller version of this backdrop; and cameras, angles, lenses, etc. can vary so much! So I'd hate to tell you to chop a foot or two in each direction, only to have you disappointed with the function.
It's easier to take away then to add to the size, so start with a larger frame than you think you might wish for :)
I'm thinking of doing something like this to create a backdrop at my wedding in September. My fiance is going to love getting to put this together! Thanks!
ReplyDeleteJust a thought... If you glue the feet parts together, then you could always fill them with play sand. The additional weight would help with any rocking and make the entire stand sturdier. You would want to make some type of little caps to close off the stands on the vertical part during travel.
ReplyDeleteDo you think this would work if I want to make it 6-8' high and 8 foot wide?
ReplyDeleteWith some extra support, yes. Check out the previous comments for suggestions!
DeleteThank you for this idea. I'm putting together a small studio and am seriously considering building this. I do have one quick question though. Do you think it would be sturdy enough for a seamless paper roll? I plan to use both cloth and paper back drops. Thanks again!
ReplyDeleteDo you think this would be sturdy enough to hold a roll of seamless paper? Thanks!
ReplyDeleteI have put seamless on it, yes! Just make sure you weigh down the "feet."
DeleteJust finished setting mine up. It's such a great size, definitely big enough even for group shots! Thank you for this tutorial. There are so many online, and yours was the easiest to follow and made the most sense design-wise. Excellent. Saved me bunches from buying one on Amazon, and the fiance thanks you, too. I got the PVC cutter, which he'd been wanting for awhile. Although I only needed it for this one project, he now has it for all his others. He's happy, too!
ReplyDeleteCould I ask a silly question? How do you attach the various backdrops to the stand? I'm hoping to make one of these in the next few days, but I admit I'm at a loss when it comes to how I'm going to actually attach these backdrops!
ReplyDeleteThanks! :)
Hi Amanda! Can you see those small, red clamps at the bottom of the first image in this post? The one that includes my little guy :) ...I use those! They're sold at the hardware store for a couple of dollars, and seriously strong. If I'm using seamless paper, I thread the top piece of PVC right through the center of the roll. Hope that helps!
DeleteThanks so much for this tutorial!! I bought everything and assembled it this morning in about 15 minutes. Can't wait to surprise my hubby with my newfound knowledge of how to use the miter saw! (couldn't find a hacksaw)! I'll be taking pictures of my son all weekend now!
ReplyDeleteHello! What size should i get in the elbows and t shapes?
ReplyDeleteElbows and other connections are sold in corresponding sizes. For one inch pipe, you'll want to look for the fittings that are also labelled with one inch :)
Deletegreat post
ReplyDeleteSpent just under $20 bucks to make mine, I am so excited, it looks GREAT! This is perfect for what I am doing. I will post pictures when I am done. Thanks so much Christina.
ReplyDeleteMaking mine today! Can't wait to rock this and have my kids see me making it myself.
ReplyDeleteThanks for the info! I just made one :D I didn't use the caps and saved almost $6 (yeah it looks better that way but it's still PVC so you can't make it pretty lol) and used T's on the top corners rather than elbows so I could add an extra foot to each side for when I use my 6' or 7' backdrops :)
ReplyDeleteThanks for the post. Just made this in about 1.5 hours (including trip the the hardware store). Looks great and the hardware store made all the PVC cuts so it was literally a snap to put together.
ReplyDeleteI made mine 6'x7' and I wish I would have extended the "feet" from 6" to 1' as it is a little wobbly. I also added a connector to the two 6' cross pieces so the whole thing breaks down a little smaller.
The PVC was only $11 plus fittings. The expensive part was the clamps 9 @ $3/ea
Whole project minus the backdrop cost $50
Thanks again!
My Fiance and I went to Home Depot and had the pvc cut for free. We came home to put it up together, but while I was in the kitchen preparing marinade for our steaks, unbeknownst to me, he had put it together on his own. I promise you I was in the kitchen no more than 10 minutes. He said it was the easiest thing ever and was really thankful for the tutorial. In total, we spend $32 to build it and that is because we bought additional pvc to make it 6.5 inches tall. We are looking forward to putting it to use during our midnight, July 4 nuptials! Thank you SO much!!!
ReplyDeleteI have been looking on-line for a cheap way to do a backdrop and I found this and I am so excited. I also found a you tube video on how to make an inexpensive light stand and you use a clamp light. The parts cost $8.00 with out the lamp. The you tube video is called Make a PVC light stand for under $5.00. It cost me more than that, but it is still cheaper than buying a light stand.
ReplyDeleteWow! You are simply awesome! I cannot explain how easy this was to make! I would love to know if you have any ideas on making the actual backdrop. :) Thanks so much!
ReplyDeleteI'm so glad you like the tutorial! There are a few ideas tossed around in the comments... canvas back drops, shower curtains, patterned table cloths, etc.. let your imagination run wild! Of course, you can also slip a roll of seamless paper into the top bar. Just make sure you've got some weight (sand bags, for example) on the bottom of the stand to prevent tipping.
DeleteHi!!!
ReplyDeleteWe just made this tonight!! I am a new business owner in the pacific northwest, and the rain is here, and I am not set up for indoors yet, so this was perfect for a new photographer on a budget!!
I love it!!
I wanted to find you and hug you when we finished it tonight..
Thanks so much!!! :)
This is the cutest comment!! ;) ...and I live in the PNW too, p.s. ;)
DeleteHow prices have changed in the last few years. I ordered the PVC needed but I could have bought a metal frame on amazon for cheaper than I just paid at Lowe's :( It was almost $40 for everything (I did order an extra 10' due to using a slightly larger dimension, 6 foot instead of 5) This probably would have been a better purchase in my opinion mainly because it has adjustable dimensions. http://www.amazon.com/gp/product/B00I85Y9TC/ref=s9_simh_gw_p421_d0_i1?pf_rd_m=ATVPDKIKX0DER&pf_rd_s=desktop-1&pf_rd_r=1TT9N813VCH6Q47CHVC9&pf_rd_t=36701&pf_rd_p=2079475242&pf_rd_i=desktop
ReplyDeleteI will be making this tomorrow, but instead of the clamps if you get a pvc pole the next size up you can cut it in like 4-6 inch sections and use them as your clamps roll your backdrop over the top and put the new clamp right over the top it should snap right down and hold your backdrop. Thanks for the tips.
ReplyDeleteMade this tonight!!! Perfect! I'll use it tomorrow for a shoot and let you know how it goes! Thank you!
ReplyDeleteGreat job. Thanks for sharing.
ReplyDeleteThanks for the post! I will be making one in the next few days, but a bit taller so adults can stand in front of it. :)
ReplyDeleteHi there I just used this blog to get my items and build my back drop stand. Its now 2016 and it cost me $30 at a local Home Depot. I loved it, it was easy to assemble for me. Now to figure out a way to transport as I currently drive a scooter. Home Depot was nice and made all my cuts for me. Thanks for the blog it was very helpful.
ReplyDeleteI bought almost everything; Lowe's only had two "T" pieces! I put some of it together though, and it looks pretty good!
ReplyDeleteI am so happy to find this site as I needed to make a backdrop for a photobooth for daughter's wedding. I have few questions to you as we need a backdrop with 8 feet height and 5 feet width-
ReplyDeleteDo we need to purchase larger diameter pipe?
Do we need to base piece length for current 36"x12"?
I'm planning on doing this only taller and wider for group shots!
ReplyDeleteHi Christina, I thought this was a very helpful blog and I can't wait to make one of these myself! I recently wrote a post about DIY Photoshoot Backgrounds and I just had to include this! Please check it out when you get a chance. Have you seen all of these ideas before? A few of them I've never seen or thought of. http://partytime-rentals.com/blog/diy-photoshoot-backgrounds/
ReplyDeleteThis is the type of information I’ve long been trying to find. Thank you for writing this information. loft conversions twickenham
ReplyDeleteThank you so much for this! Couldn't be happier with it and it was so easy!
ReplyDeleteThe woman who helped me at Home Depot also told me about a tool cuts up to 1 1/2 PVC, it was $11 and SO worth the money. Thank you again!!!